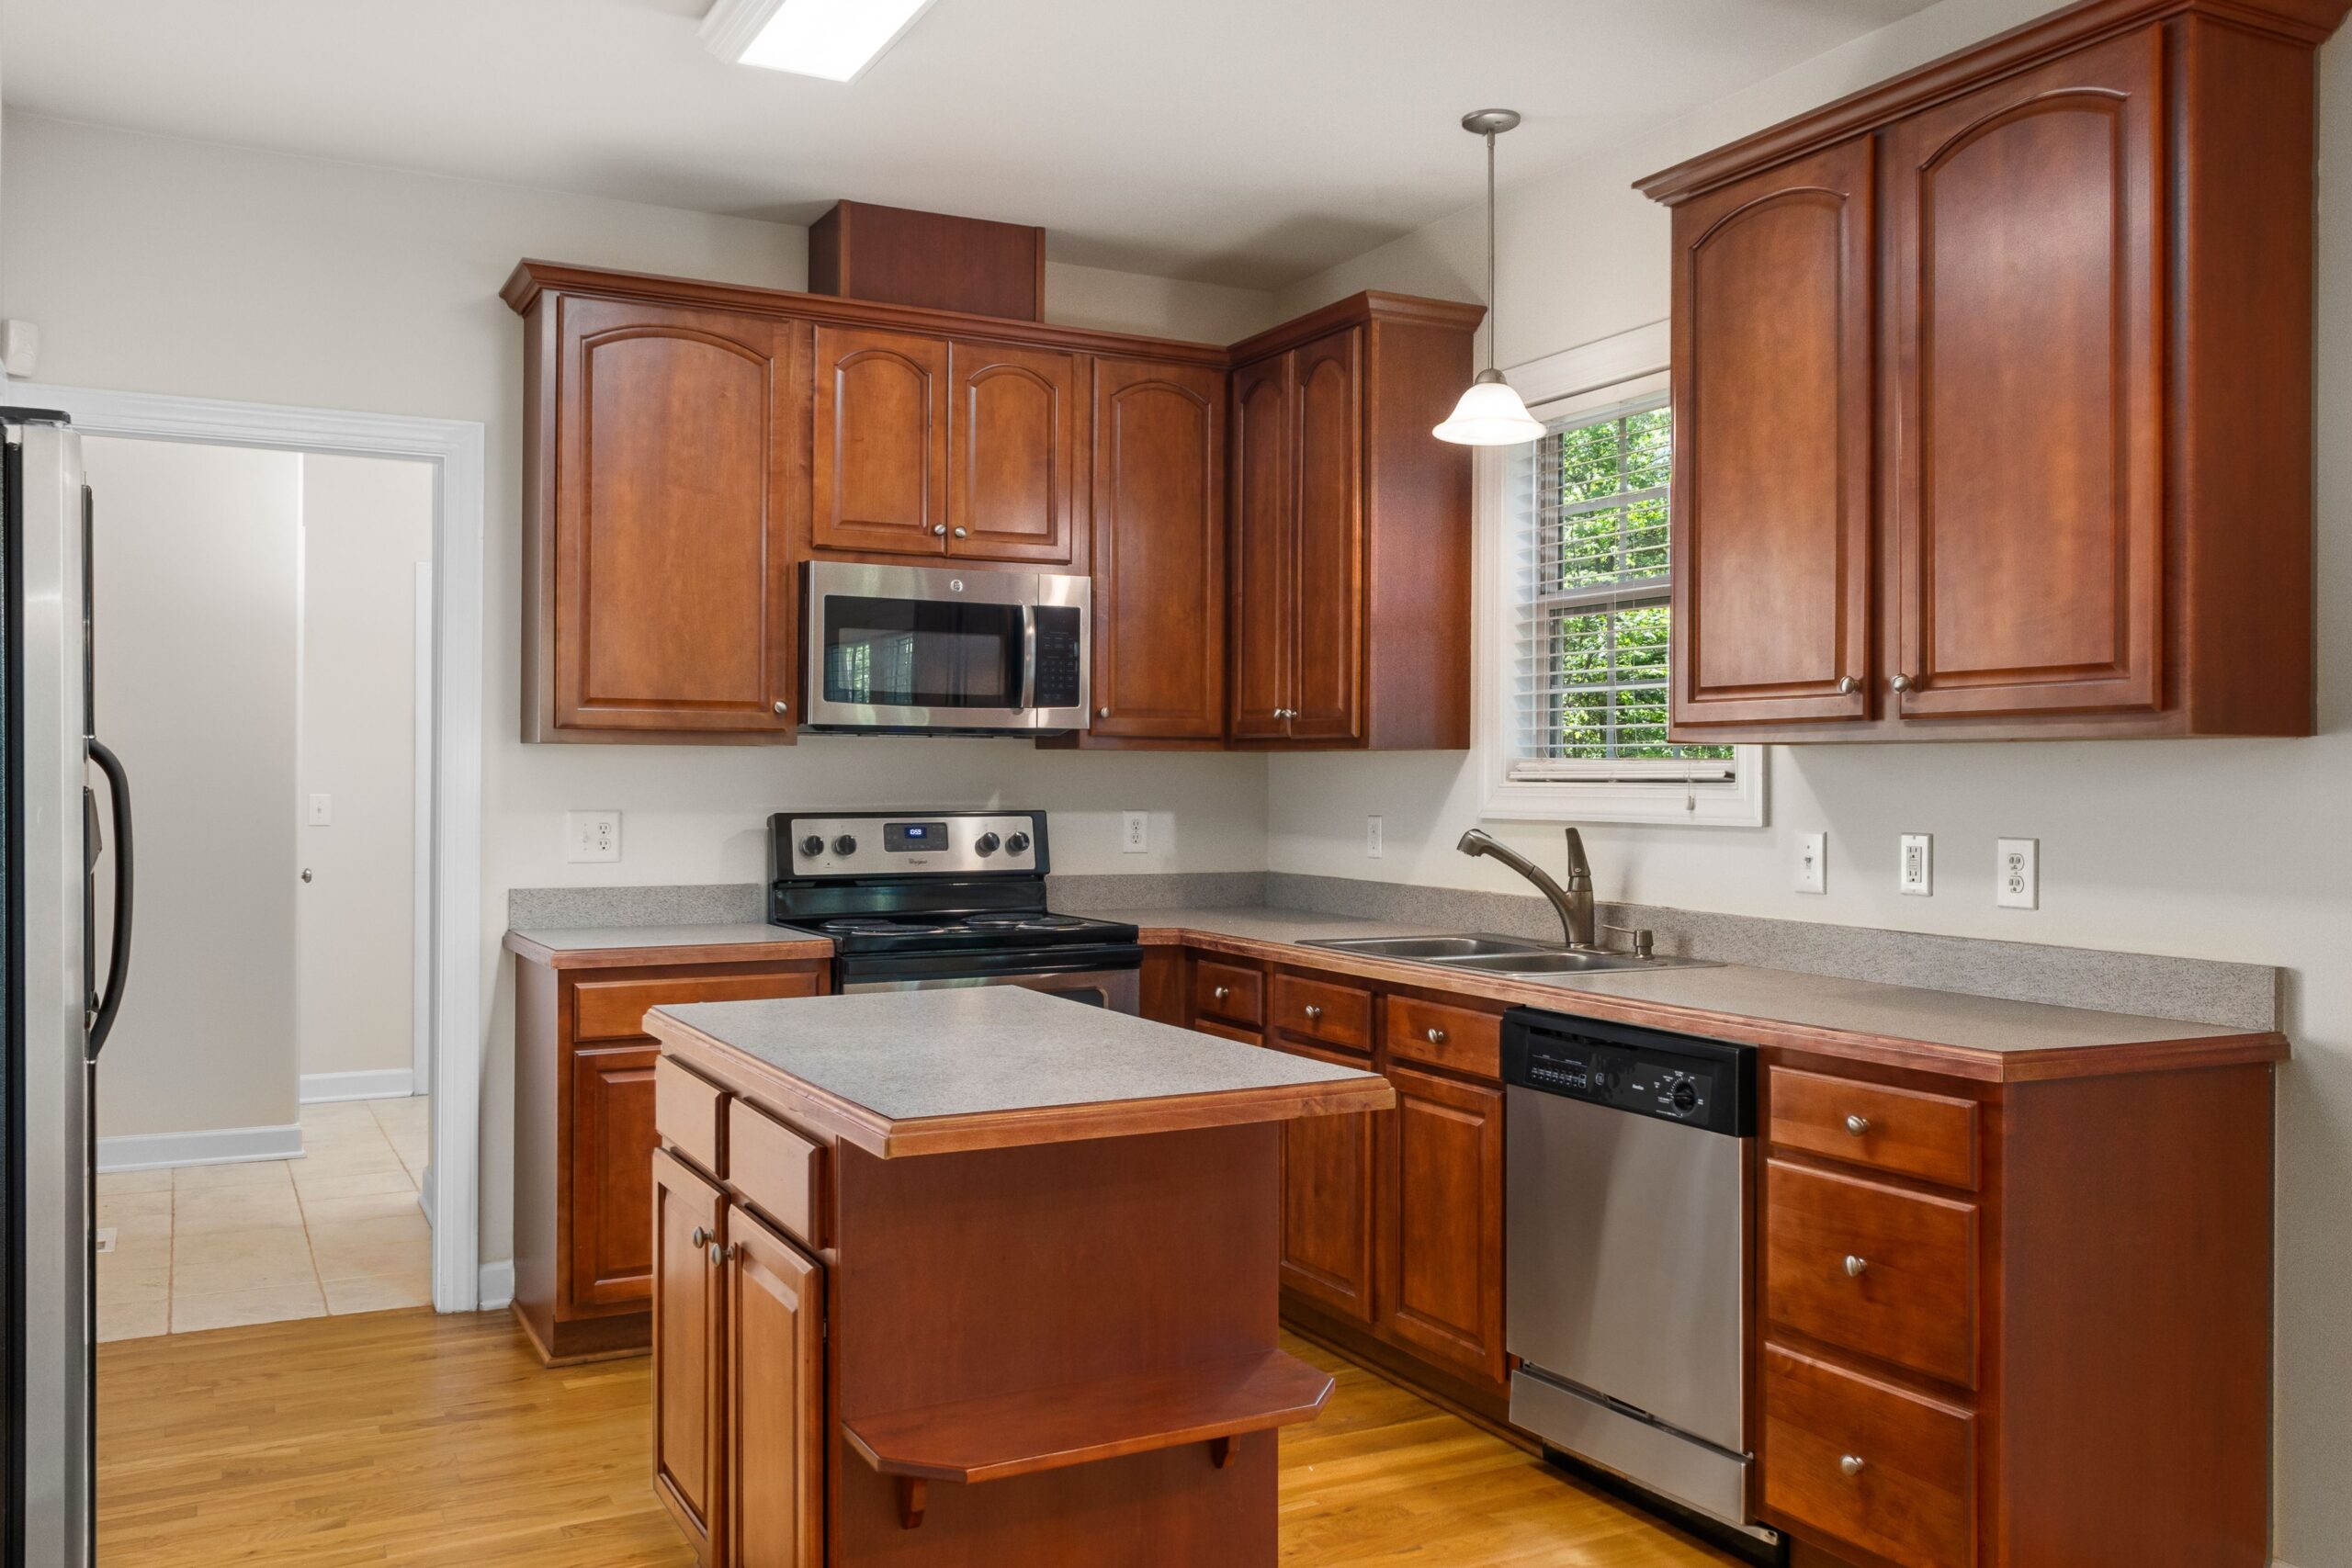
Introduction
A small kitchen can feel outdated, cramped, or difficult to organize, especially when cabinets are worn, countertops are cluttered, and lighting is inadequate. However, you do not need a large budget to make a noticeable improvement. With thoughtful planning, affordable materials, and a few practical upgrades, you can transform an ordinary cooking space into a kitchen that looks fresh, feels comfortable, and works better for everyday life.
A before and after budget small kitchen remodel demonstrates how simple changes can make a big difference without requiring a complete renovation. Repainting cabinets, replacing old handles, improving lighting, adding storage organizers, and refreshing the backsplash are examples of updates that can improve a kitchen’s appearance while keeping costs under control.
The most successful remodels focus on the problems that affect the room every day. Instead of replacing everything, identify which features need attention and which existing elements can be reused.
In this guide, you will discover affordable remodeling ideas, practical examples, cost-saving tips, and a step-by-step plan for updating a small kitchen on a limited budget.
1. Understand the Before and After Transformation
Before beginning a kitchen remodel, take a close look at the room’s current condition. Many small kitchens have good structural features but need cosmetic improvements and better organization.
Before: Common Problems in Small Kitchens
An outdated kitchen may have dark cabinets, stained walls, worn hardware, poor lighting, and limited countertop space. These issues can make the room feel smaller and less inviting.
Other common problems include overcrowded drawers, unused corners, damaged cabinet finishes, and appliances that occupy too much working space.
Before spending money, write down the three or four problems that affect your kitchen the most.
After: What an Affordable Remodel Can Achieve
After a carefully planned renovation, the same kitchen may have refreshed cabinets, brighter lighting, organized storage, and a more coordinated color scheme.
You might keep the existing cabinet boxes and appliances while updating their appearance. This approach reduces waste and avoids the expense of replacing functional items.
Creating an appealing kitchen doesn’t require costly upgrades or luxury appliances. Focus on making the space more organized, visually pleasing, and functional while staying within your budget.
2. Refresh Old Cabinets Instead of Replacing Them
Cabinets often occupy a large part of a kitchen’s visible area. When their structure is still sound, updating their finish can be one of the most effective ways to improve the room.
Before: Dull or Outdated Cabinetry
Old cabinets may have faded paint, scratched doors, or a finish that no longer matches your preferred style. Replacing the entire cabinet system can be expensive and may involve additional labor.
After: Fresh Cabinets With a Modern Appearance
Painting suitable cabinets in white, warm beige, pale gray, or muted green can create a more contemporary look.
For a successful result:
Clean away grease and dirt before painting.
Repair minor dents and surface damage.
Sand and prime the surfaces when required.
Use paint designed for the cabinet material.
– Let the finish dry and cure fully, following the product manufacturer’s recommended guidelines..
You can also replace outdated knobs and handles with simple, coordinated hardware.
Budget tip: If the cabinet doors are damaged beyond repair but the cabinet boxes remain sound, consider replacing only the doors rather than the entire installation.
Always check whether the existing material can be painted or refinished before purchasing supplies.
3. Use Light Colors to Make the Kitchen Look Larger
Color can influence how spacious a small kitchen appears. Light surfaces often reflect more light, helping a compact room feel brighter.
Before: Dark Colors and Heavy Visual Details
Dark cabinets, heavily patterned surfaces, and poor lighting can make a small kitchen feel visually crowded, especially when natural light is limited.
After: A Brighter and More Open Space
Consider white, cream, soft beige, or pale gray for cabinets and walls. These shades create a versatile background that works with many decorating styles.
You can introduce contrast through wooden accessories, darker cabinet handles, or a patterned backsplash.
If you prefer bold colors, use them on a small section of cabinetry or through decorative accessories instead of covering every surface.
You do not have to repaint the entire kitchen. Updating one prominent area may be enough to create a noticeable difference.
4. Upgrade the Backsplash Without Spending Too Much
A backsplash protects the wall behind the sink and cooking area while providing an opportunity to improve the kitchen’s appearance.
Before: Stained or Outdated Walls
Old backsplash materials may have discolored grout, visible stains, or patterns that make the room feel dated.
After: A Clean and Coordinated Finish
If the existing backsplash is structurally sound, thorough cleaning and appropriate grout repairs may be all it needs.
If an update is necessary, consider affordable options such as:
Simple ceramic tiles.
Budget-friendly peel-and-stick backsplash products suitable for the location.
A fresh finish using materials approved for kitchen walls.
Small decorative tile sections that create an accent.
Choose colors that complement the cabinets and countertop. Simple patterns can help the room look organized without overwhelming a compact space.
Before installing adhesive panels, check the manufacturer’s instructions, the wall’s condition, and the product’s suitability near heat and moisture. Some materials are not appropriate directly behind a cooktop.
5. Improve Countertops Without Replacing Everything
Countertops are among the most frequently used surfaces in a kitchen. Scratches, discoloration, and chipped edges can make the whole room look less attractive.
Before: Worn or Cluttered Work Surfaces
An older countertop may look tired even when it remains functional. Small kitchens can also appear crowded when appliances, jars, and cooking tools cover most of the available surface.
After: A Cleaner and More Practical Countertop
Start by removing unnecessary items and cleaning the surface thoroughly. Organize frequently used utensils in a compact holder and store rarely used appliances in cabinets.
If the countertop is damaged, explore repair or refinishing options suitable for its material. Some surfaces can be restored with specialized products, while others may require professional attention.
A countertop covering or refinishing kit may offer a lower-cost alternative to replacement, but it must be appropriate for food preparation areas and follow the manufacturer’s safety instructions.
Compare the cost of refinishing with the cost of a replacement before making a decision.
6. Replace Old Lighting With Affordable Alternatives
Lighting can dramatically influence the appearance and usability of a small kitchen. Even attractive cabinets may look dull when the room is poorly illuminated.
Before: Dark Corners and Shadows
A single ceiling light may leave important work areas in shadow. This makes food preparation less comfortable and can make the kitchen appear less welcoming.
After: Brighter Work Areas
Use suitable lighting to improve visibility in the main cooking and preparation areas.
Consider these options:
LED ceiling bulbs for general illumination.
Under-cabinet lights for countertops.
Rechargeable lights where permanent wiring is impractical.
Compact ceiling fixtures that suit the room’s dimensions.
Choose bulbs with a comfortable color temperature that complements your cabinet and wall colors.
Electrical installations should be handled safely and in accordance with local requirements. If you rent, seek permission before making permanent changes.
7. Maximize Storage in a Small Kitchen
A remodel should improve more than appearance. Better organization can make daily cooking easier without requiring additional cabinets.
Before: Crowded Drawers and Unused Corners
Kitchen tools may be mixed together, pots may be stacked awkwardly, and groceries may occupy valuable countertop space.
After: Organized Cabinets and Clear Surfaces
Use affordable organizers to make existing storage more effective.
Try these practical ideas:
Add drawer dividers for utensils and cutlery.
Install suitable shelves inside tall cabinets.
Use stackable containers for dry ingredients.
Organize spices in a compact rack.
Add hooks for lightweight utensils where appropriate.
Use vertical storage for baking trays and cutting boards.
Store infrequently used items away from the main preparation area.
Measure cabinets before purchasing accessories. A well-fitted organizer is more useful than an expensive product that does not suit the available space.
8. Refresh the Kitchen Floor on a Budget
Flooring affects the overall appearance of the kitchen, but a complete replacement is not always necessary.
Before: Worn or Dated Flooring
Scratched surfaces, stained grout, and mismatched materials can make the room feel older than it is.
After: A Cleaner and More Coordinated Floor
Begin with a deep clean using a product appropriate for the existing material. Repair minor grout problems or damaged sections where possible.
If replacement is necessary, compare affordable flooring options that are suitable for kitchens and compatible with the existing subfloor.
Some peel-and-stick products are designed for indoor flooring, but they are not appropriate for every surface or moisture condition. Confirm their suitability before installation.
Select flooring with a safe, slip-resistant finish and follow the manufacturer’s instructions.
9. Add Affordable Decorative Details
Small decorative changes can help connect the different elements of your remodeled kitchen.
Instead of buying numerous accessories, select a few items that complement the cabinet finish, wall color, and countertop.
Ideas include:
Matching storage jars for dry ingredients.
A washable kitchen runner designed for the area.
Coordinated dish towels and oven mitts.
A small plant suitable for the available light.
Simple wall art placed away from heat and splashes.
A compact fruit bowl or utensil container.
Avoid covering every surface with decorations. Keeping the countertop relatively clear helps preserve the clean appearance created by the remodel.
10. Set a Realistic Budget for Your Remodel
The cost of a small kitchen makeover depends on the location, material quality, labor rates, and condition of the existing kitchen.
A cosmetic refresh may involve cleaning, painting, new handles, and improved organization. A more extensive project could include countertop work, flooring, new appliances, or cabinet replacement.
Use the following table as a planning guide rather than a price quote.
| Project | Lower-cost approach |
| Cabinets | Repaint or refinish suitable existing cabinets |
| Hardware | Replace selected handles and knobs |
| Backsplash | Repair existing tiles or use a suitable affordable alternative |
| Lighting | Replace compatible bulbs or add plug-in lights |
| Storage | Use drawer dividers and cabinet organizers |
| Countertops | Clean, repair, or refinish where appropriate |
| Flooring | Deep-clean or repair before considering replacement |
| Decoration | Reuse existing items and add a few coordinated accessories |
Before buying materials, compare several suppliers and calculate the total cost, including tools, delivery, installation, and waste.
Keep a contingency allowance for unexpected problems, particularly if you discover water damage, faulty wiring, or deteriorated plumbing.
11. Step-by-Step Plan for a Budget Small Kitchen Remodel
Following a clear order can prevent unnecessary spending and repeated work.
Step 1: Take Before Photos
Photograph the kitchen from several angles. Record the existing problems and measurements so you can compare the results later.
Step 2: Decide What Must Change
Separate essential repairs from cosmetic improvements. Address safety problems, leaks, and damaged surfaces before decorating.
Step 3: Set Your Budget
Decide how much you can comfortably spend. Allocate money to the most important improvements first.
Step 4: Reuse Functional Materials
Keep cabinets, appliances, and countertops that remain safe and serviceable. Reusing suitable materials can reduce both costs and waste.
Step 5: Complete Repairs and Painting
Clean surfaces, repair damage, and prepare cabinets and walls before applying new finishes.
Step 6: Install Hardware and Lighting
Once surfaces are ready, fit the new handles, suitable organizers, and lighting. Follow product instructions and safety requirements.
Step 7: Organize and Decorate
Return only useful items to the kitchen. Arrange storage logically and add a few decorative details.
Step 8: Compare the Before and After Results
Review your photographs and evaluate whether the kitchen is easier to use, more organized, and visually improved.
12. Common Mistakes to Avoid
A low-cost remodel can become expensive when decisions are made without sufficient planning.
Avoid these common mistakes:
Replacing functional cabinets unnecessarily: Painting or repairing suitable cabinets may offer better value.
Buying materials before measuring: Incorrect sizes can lead to wasted money and installation problems.
Choosing appearance over safety: Flooring, electrical work, ventilation, and cooking-area materials must be appropriate for their intended use.
Ignoring hidden damage: Water leaks, mold, and deteriorated surfaces should be addressed before cosmetic improvements.
Spending the entire budget immediately: Reserve some money for unexpected repairs and essential finishing materials.
Overdecorating the room: Too many accessories can reduce usable space and make the kitchen look crowded.
A successful renovation prioritizes durability, practical improvements, and careful spending.
Conclusion
A before and after budget small kitchen remodel shows that a complete transformation does not always require expensive materials or a major renovation. Repainting cabinets, refreshing the backsplash, improving lighting, organizing storage, and updating hardware can make a small kitchen more attractive and functional.
Start by identifying the biggest problems in your current kitchen. Measure the space, establish a realistic budget, and decide which existing features can be reused. Then complete improvements in a sensible order, giving priority to repairs and safety before cosmetic changes.
Remember that the best remodeling decisions are those that improve everyday life. With careful planning, affordable materials, and a focus on practical details, you can create a kitchen that looks refreshed, makes better use of limited space, and remains within your budget.
Frequently Asked Questions
1. How can I remodel a small kitchen on a tight budget?
Focus on cabinet painting, new hardware, better lighting, storage organizers, and affordable decorative updates. Keep functional cabinets and appliances whenever possible.
2. What should I update first in a small kitchen?
Address leaks, damaged surfaces, and safety concerns first. After essential repairs, consider the improvements that will make the greatest visual and practical difference.
3. Can I paint my kitchen cabinets instead of replacing them?
Yes, if the cabinets are structurally sound and the existing material is suitable for refinishing. Proper cleaning, preparation, primer, and appropriate paint are important.
4. How do I make a small kitchen look bigger without renovation?
Use light colors, improve lighting, reduce countertop clutter, and organize vertical storage. These changes can make the space feel more open without altering its structure.
5. Are inexpensive backsplash materials worth considering?
They can be useful when the product is suitable for the installation area and installed correctly. Always check heat resistance, moisture suitability, and manufacturer instructions.
6. How can I save money on kitchen cabinets?
Keep functional cabinet boxes, refinish suitable doors, replace only damaged components, and compare hardware prices before buying.
7. Is DIY remodeling suitable for a small kitchen?
Many cosmetic projects, such as painting and organizing, can be suitable for DIY work. Electrical, plumbing, gas, and structural tasks may require qualified professionals.
8. How can I improve kitchen storage without adding cabinets?
Use drawer dividers, stackable containers, suitable wall-mounted storage, and pull-out organizers. Remove unused items to create additional room.
9. Should I replace my kitchen countertop during a budget remodel?
Not necessarily. If the countertop remains safe and functional, cleaning, repair, or suitable refinishing may be more economical than replacement.
10. How do I make sure my kitchen remodel stays within budget?
Plan the work in advance, compare material prices, reuse functional items, track every expense, and keep a contingency allowance for unexpected repairs.